Troubleshooting Harley Davidson turn signals typically involves checking the bulbs, wiring, and fuses. Faulty connections or a damaged relay can also cause signal issues.
Troubleshooting turn signals on a Harley Davidson is a common task for riders. Proper functioning of turn signals is crucial for safe riding and is a legal requirement on the road. Issues can range from simple burned-out bulbs to more complex electrical faults.
Riders should regularly inspect their motorcycle’s turn signals to ensure they operate correctly. Simple checks like ensuring the turn signal bulbs are in working condition, examining the condition of the wiring, and verifying the integrity of fuses are the first steps. Sometimes, it may involve delving into the bike’s electrical system to find a damaged relay or a corroded connection. Riders with a bit of mechanical know-how can often resolve these issues on their own, keeping their Harley Davidson’s signaling system functioning as it should for safe, trouble-free rides.
Credit: www.kraftradteile.com
Introduction To Harley Davidson Turn Signal Issues
Turn signals are key for safe riding on any motorcycle, including Harley Davidsons. They let other drivers know your move. Noticing a turn signal issue early can prevent accidents. It’s important for the well-being of both the rider and the motorcycle.
Harley Davidsons riders often report turn signal problems. These can include signals that won’t flash, stay on without flashing, or don’t turn on at all. Sometimes, the issue might be a rapid flashing signal.
The bike’s age or electrical problems can cause these symptoms. Symptoms can also arise from a burned-out bulb or a blown fuse. Riders should check these first. A bad relay or faulty wiring might also be the problem.
Understanding these common symptoms is crucial. It helps riders fix issues quickly and safely.
Pre-troubleshooting Steps
Before troubleshooting your Harley Davidson turn signals, ensure a safe environment. Your bike should be on a flat surface. Make sure the workspace is well-lit and there is plenty of room to work. Gather all the necessary tools and materials before starting. Keep a clean workspace to avoid losing any parts.
| Tool/Material | Use |
|---|---|
| Multimeter | Test electrical connections |
| Pliers | Adjust or remove parts |
| Screwdrivers | Open signal housing |
| Clean Cloth | Clean parts and surfaces |
| Replacement Bulbs | Replace if original is faulty |
| Owner’s Manual | Reference for specs and diagrams |
Double-check for the correct replacement parts. Use the owner’s manual to understand your bike’s specs. Always disconnect the battery before starting the troubleshooting to prevent shocks.
Basic Troubleshooting Procedures For Turn Signals
Basic troubleshooting for Harley Davidson turn signals begins with bulb and socket inspection. Check for burnt-out bulbs and ensure sockets are free of corrosion. Replace any damaged parts to resolve issues.
Turn signal switch problems may cause malfunction. Test the switch and look for signs of wear or damage. A faulty switch will need prompt replacement.
Examine the wiring and connectors for signs of trouble. Frayed wires or loose connections can disrupt signal operation. Secure any detached connectors and replace worn wires to restore functionality.
Advanced Diagnostic Techniques
Advanced diagnostic techniques are essential for Harley Davidson riders. Using a multimeter can help inspect electrical parts. Faulty wires or components may cause blinker issues. Testing each segment with a multimeter ensures proper voltage levels.
Turn signal circuit problems often lurk behind complex wiring. Wiring diagrams simplify tracing issues. These blueprints show the path current takes. A keen eye and understanding of diagrams can pinpoint exact faults.
- Check the relay if lights act up.
- Relays control the blinking pattern.
- Bad relays disrupt signal rhythm.
- Replace the relay to restore functionality.
Repair And Replacement Guidance
Repairing a Harley Davidson turn signal may seem daunting. First, identify the faulty parts needing replacement. Ensure the motorcycle is off and the battery disconnected before starting.
Follow the manual for your specific model to locate and remove the defective turn signal. Gather the right tools and the replacement part. Unscrew or unclip the turn signal housing to access the damaged component. Carefully remove the faulty part and replace it with a new, functioning piece.
Adjusting the timing and blink rate involves fine-tuning. This step is critical for safe riding. Use a screwdriver or a special tool, usually provided by the manufacturer, to make these adjustments on the relay or module.
For the final test, reconnect the battery and start the motorcycle. Activate the turn signals to ensure they blink correctly and at the right pace. Inspect both front and rear signals for synchronized operation. This indicates a successful repair or replacement.

Credit: www.xr1200ownersgroup.com
Preventive Measures And Best Practices
Keeping your Harley’s turn signals in check is vital for safe rides. Routine maintenance should include cleaning contacts and checking for loose wires. A simple monthly inspection can prevent most issues.
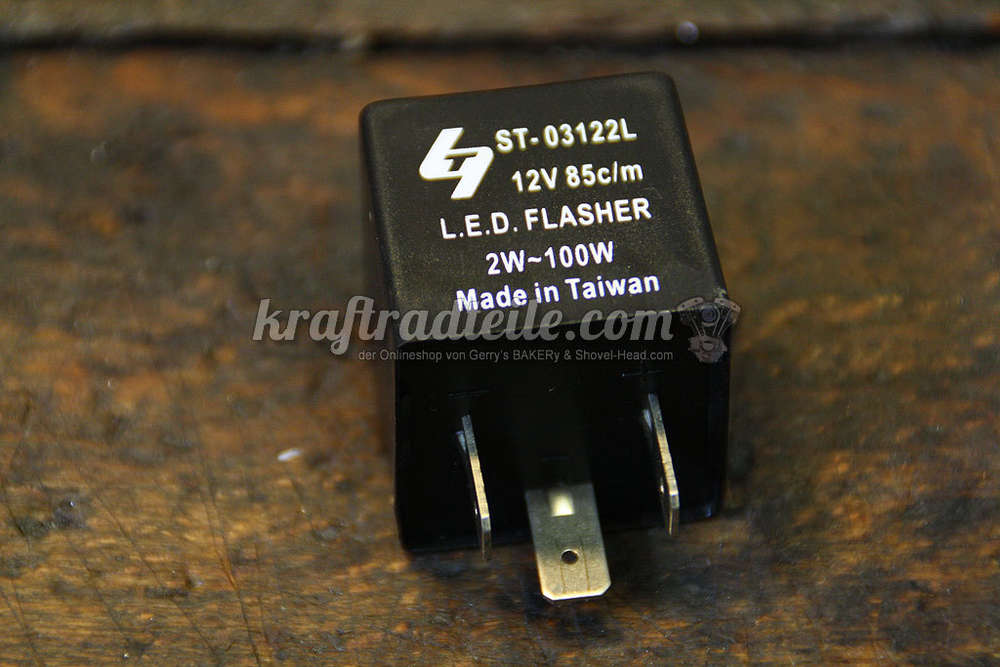
Enhancing performance might involve LED upgrades. LEDs are brighter and last longer. Upgrading flasher units complements LED lights. This combination ensures clear signaling to other road users.
Seek professional help if troubleshooting gets tricky. Mechanics have tools and expertise. They can pinpoint and fix complex electrical problems. Always choose certified technicians for your Harley.
Conclusion And Summary
Ensuring turn signals work is vital for rider safety. Regular checks are key to spot issues early. Broken signals can lead to accidents. Riders must check for common problems.
Common troubleshooting steps include:
- Inspecting bulbs for damages or burnouts
- Checking wiring connections
- Testing the switch for functionality
- Ensuring the fuse is intact
- Examining the relay system for faults
Fixing issues quickly is essential. It helps keep everyone on the road safe. A pro may help if problems continue.

Credit: www.hdforums.com
Frequently Asked Questions Of Harley Davidson Turn Signal Troubleshooting
How Do You Reset Harley Turn Signals?
To reset Harley turn signals, power on the ignition, press and hold both turn signal switches, turn off the ignition, then release the switches. This process initiates a reset of the turn signal module.
How Do You Diagnose A Turn Signal Operating Problem?
To diagnose a turn signal problem, check the bulb, fuse, relay, turn signal switch, and wiring for damage or failure.
How Do You Know If Your Turn Signal Relay Is Bad?
A bad turn signal relay may show symptoms like non-functioning blinkers, a solid turn signal light, or unusually fast or slow blinking.
Why Does My Motorcycle Turn Signal Not Work?
Your motorcycle turn signal may not work due to a burnt-out bulb, faulty wiring, a dead battery, a damaged flasher relay, or a malfunctioning switch.
Conclusion
Navigating the twists and turns of Harley Davidson signal issues doesn’t have to be a solo ride. Embrace these troubleshooting steps to keep your bike’s communication clear on every journey. Remember, regular maintenance and prompt attention to signal hiccups keeps the road ahead safe and your ride enjoyable.
Keep riding, keep signaling, and always stay visible.
