To replace a stator on a Harley Davidson, first disconnect the battery and remove the outer primary cover. Then, extract the old stator, install the new one, and reassemble the primary components.
Motorcycle maintenance keeps your ride smooth and safe, with the stator replacement on a Harley Davidson being a crucial aspect of this upkeep. The stator, a key component of the bike’s charging system, transforms mechanical energy into electrical charge, powering your motorcycle’s electrical systems.
Replacing a faulty stator ensures your Harley’s engine runs efficiently without facing electrical hiccups. Riders with mechanical aptitude often handle this task at home to save on service costs. This guide streamlines the process, providing you with the critical steps and tips to successfully replace the stator, upholding your bike’s performance and prolonging its life on the road. It’s an intermediate level task that involves several key electrical connections and mechanical components, so accuracy and caution are paramount.
Credit: www.fixmyhog.com
Introduction To Motorcycle Maintenance
The stator in a Harley Davidson is key for powering the bike’s electrical systems. A well-functioning stator ensures that the motorcycle’s battery remains charged during operation. Spotting signs of a failing stator early can save you from being stranded or facing costly repairs.
Some common symptoms include dim lighting, difficulty starting, or an unusually dead battery. A multimeter check may reveal irregular voltage. This could point to a stator issue. Regular maintenance checks can help detect these problems early. Riders should inspect their stator’s condition as part of their routine motorcycle care.
- Dimming headlights or dashboard lights
- Motorcycle has problems starting
- Battery keeps dying unexpectedly
- Erratic readings on the voltmeter

Credit: m.youtube.com
Preparation For Stator Replacement
Before replacing a stator on a Harley Davidson, gather all necessary tools and materials. Essential items include a set of screwdrivers, pliers, and a multimeter. Ensure you have a proper torque wrench and new stator. Purchase high-quality replacement parts for a smoother process.
Safety is paramount. Wear protective gloves and eyewear. Perform the replacement in a well-ventilated area, free from gasoline and other flammables. Disconnect the battery to prevent electrical shorts. Make certain the motorcycle is on a stable platform to avoid any mishaps.
To identify the right stator, check your Harley Davidson’s model number. Different models may require unique stators. Refer to the manual or online resources to ensure compatibility. This step helps in buying the correct replacement part.
Removing The Old Stator
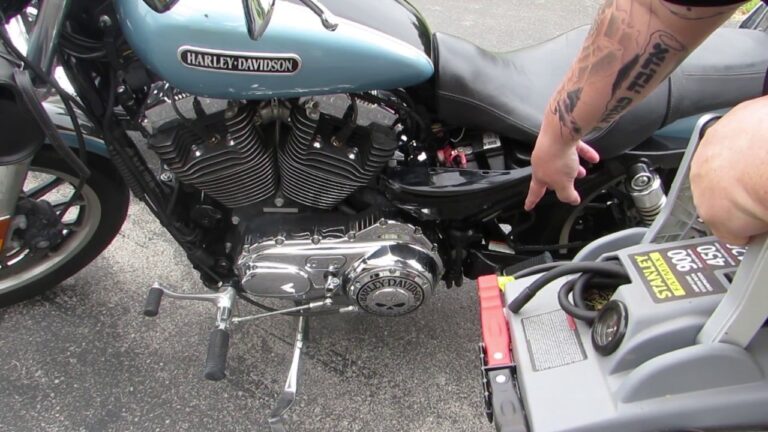
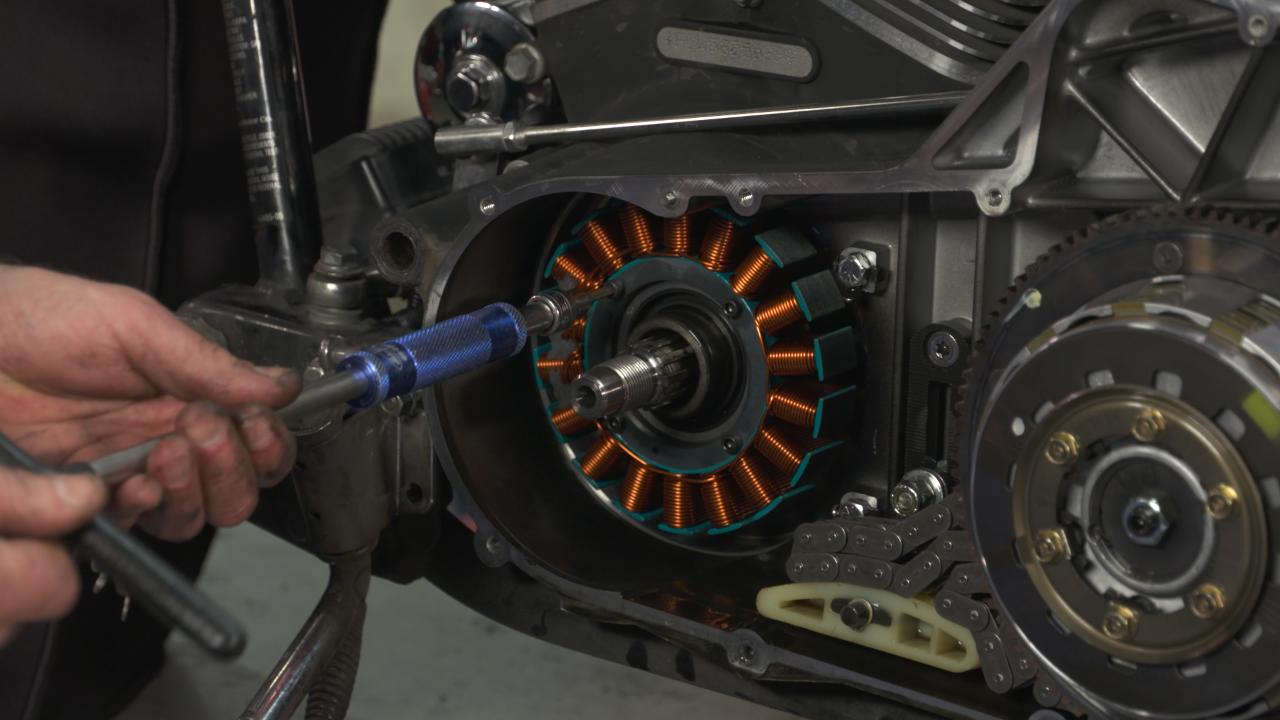
Removing the Old Stator on a Harley Davidson requires precision and care. Start by accessing the Stator Compartment: This process involves removing the primary cover to expose the stator. Ensure the motorcycle is stable and cool before you begin. Next, follow the Step-by-Step Guide to Disconnecting the Stator: Carefully unplug the stator connector. Use the right tools to remove bolts without stripping them.
Tips for a Smooth Removal: Organize screws and parts as you work. This makes reassembly easier. Take plenty of pictures before you disconnect any parts. They will help during reinstallation. Always handle the stator gently. Doing this prevents damage to the delicate coils. Wear protective gloves to safeguard your hands.
Installing The New Stator
Before installing the new stator, cleanliness is key. Ensure that your hands and the motor area are free of dirt. Apply a thin layer of oil to the rubber grommet of the stator. This will help with the sealing process.
Attach the new stator by aligning it with the mounting points inside the engine casing. Tight fitment is essential. Start by connecting the wiring according to the bike’s manual. Precision is crucial, so double-check every wire connection. After connecting, the stator’s alignment with the rotor’s magnetic field is critical for efficient power generation.
Reassembly starts with the placement of the engine casing. Be sure to secure it with the original bolts for optimum fit. Next, reattach any components that were removed during the disassembly. This includes the primary cover and foot controls. Finally, ensure all bolted connections are tight for the safest ride.
Testing And Troubleshooting
Accurate electrical connections are key to a functional stator. Start by carefully inspecting all connectors and wiring. Dirt and corrosion can cause issues, so clean any grubby connections. Ensure that all pins fit tightly and are secure.
To assess the charging system, ensure the motorcycle is on a stable surface. Connecting a multimeter to the battery, set it to volts direct current (VDC). A reading above 12.6 VDC with the engine off, and between 13.5 – 15 VDC at 2000 RPMs, indicates a healthy charging system.
Issues during stator installation may involve incorrect alignment or fit. Double-check the stator part number against your Harley model. Use the manual for precise installation steps. Contact a professional if problems persist.
Maintenance And Longevity
Maintaining your Harley Davidson requires regular inspections. These checks help pinpoint issues before they worsen. Ideal maintenance involves monitoring the stator’s health. Signs of wear or damage need immediate attention to prevent stator failure.
Upgrade options may enhance your bike’s performance. Seeking quality aftermarket stators can offer better resilience. It’s essential to match these parts with your bike’s model and make. Researchers suggest opting for well-reviewed brands to ensure compatibility and durability.
Complex mechanical tasks might require a professional mechanic. If stator replacement seems daunting, expert help is advisable. Specialized tools and diagnostics are necessary for a successful install. A trusted mechanic ensures your motorcycle’s safety and performance.

Credit: www.amazon.com
Frequently Asked Questions Of How To Replace A Stator On A Harley Davidson
How Do I Know If My Stator Is Bad On My Harley?
To determine if your Harley’s stator is bad, check for battery charging issues, erratic engine performance, and difficulty starting the bike. Use a multimeter to measure the stator’s output voltage, which should match the specifications in your service manual when the engine is running.
How Hard Is It To Change A Stator?
Changing a stator can be moderately challenging. The process requires basic mechanical skills, the correct tools, and attention to your vehicle’s service manual. Vehicle type and model complexity may affect difficulty. Always disconnect the battery before starting for safety.
How Long Does It Take To Replace A Stator?
Replacing a stator typically requires 2 to 4 hours. The exact time can vary based on the vehicle model and mechanic’s experience.
What Does A Stator Do On A Harley Davidson?
The stator in a Harley Davidson generates electrical power by converting the engine’s mechanical energy into electrical energy, recharging the motorcycle’s battery during operation.
Conclusion
Wrapping up, mastering the stator replacement in a Harley Davidson ensures your ride stays powerful and reliable. By following the steps outlined, you’ll keep your motorcycle in peak condition. Remember, regular maintenance is key to the longevity of your Harley.
Stay safe and enjoy the journey ahead with confidence.
