To bleed front brakes on a Harley, start by attaching a hose to the bleed valve on the brake caliper and place the other end in a container filled with fluid. Open and close the valve while pressing the brake lever to expel air from the lines.
Maintaining your Harley’s front brakes is crucial for ensuring a safe and responsive ride on the open road. Bleeding the brakes is a routine procedure performed to remove trapped air from the hydraulic system, which can compromise braking performance and feel.
Regularly checking and servicing your brakes not only ensures optimal functionality but also prolongs the life of the brake components. This guide is designed for Harley riders who seek the knowledge to perform DIY maintenance confidently. The process might differ slightly depending on your Harley model, so consulting the service manual is a good practice. Remember to perform this task in a clean and well-lit environment to avoid contaminating the brake system and for ease of work.

Credit: m.youtube.com
Introduction To Brake Bleeding On Harley Motorcycles
Regular brake maintenance is critical for safe riding. Bleeding brakes removes trapped air to ensure responsive braking. Before starting, one must understand the process thoroughly.
Keeping brake components and fluids clean is essential. Before bleeding brakes, gather the right tools. Always wear safety glasses and use gloves to protect against brake fluid.
Confirm the motorcycle is on a stable surface. Check the brake fluid type specified for your Harley. Have plenty of clean rags on hand for spills.
Tools And Materials Needed For Bleeding Harley Front Brakes
Proper maintenance of your Harley’s front brakes is crucial for safety. Bleeding the brakes is a key process. You need certain tools and materials to complete the job successfully. Gather a brake bleeding kit, which should include a brake fluid reservoir and tubing.
Ensure you have fresh brake fluid specified for your Harley model. A set of wrenches and clear tubing will be required to loosen the bleeder valves and direct the fluid. Having clean rags at hand helps to keep the work area tidy and absorb any spills. Gloves protect your hands from the brake fluid, which can be harmful to your skin.
Optional tools like a vacuum pump can aid in quickening the process. A brake bleeder wrench or a flare nut wrench provides a better grip and reduces the risk of rounding off the bleeder valves. These tools are not essential, but they can help make the process more efficient.
Step-by-step Guide To Bleeding Front Brakes On A Harley
Begin by ensuring your Harley is stable on a flat surface. Use a lift or stand to make sure the motorcycle won’t tip. Arrange your tools nearby so everything you need is at hand.
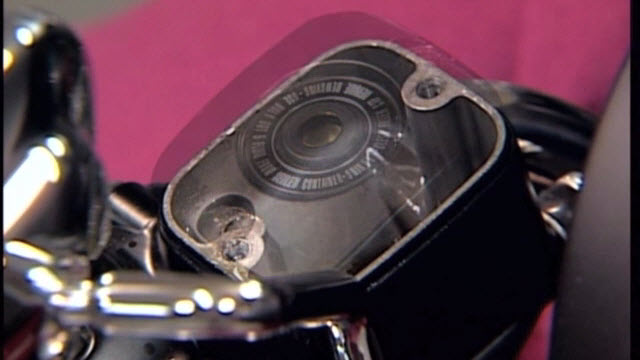
Next, identify the brake master cylinder on your motorcycle. Typically, it’s near the handlebar on the right side. Make sure it’s clean before starting — any dirt could cause problems.
The bleeding process requires focus. Attach the clear tubing to the bleeder valve and place the other end in a container. Pump the brake lever to push air and fluid out. Keep an eye on the master cylinder’s fluid level to prevent air from entering.
After bleeding, test the brake pressure. Brake lever feel should be firm. Top off the brake fluid if needed, but never go past the maximum fill line.
If you face issues, check for tight connections and correct fluid levels. Air in the lines can also cause soft brake feel, requiring another bleed.
Credit: www.fixmyhog.com
Finalizing And Test-riding After Brake Bleeding
Securing components after bleeding your Harley’s front brakes is crucial. First, double-check every bolt and connection to ensure they are tight. This prevents brake fluid leaks and ensures safety. Next, clean any spilled brake fluid immediately. Brake fluid can damage paint and surfaces on your bike.
The next step is a safety check. Press the brake lever to feel for proper pressure. Brakes should feel firm and responsive. If the lever feels spongy, you might need to bleed the brakes again. Once satisfied with the brake feel, it’s time for a test ride. Start with a slow ride in an open area. Check the brakes at low speeds before heading to traffic areas. This step confirms the success of your brake bleeding process.
Maintenance Tips To Prolong Brake Life After Bleeding
To keep your Harley’s brakes working smoothly, regular checks are crucial. Inspect the brake system often. Look at pads, lines, and fluids. Ensure everything is in good shape. Change the brake fluid regularly. This is key for safety.
Choose high-quality brake fluids for your motorcycle. Different models need different fluids. DOT 4 or DOT 5 are common for Harleys. Check your owner’s manual to be sure. Replace brake fluid every two years. It’s a must-do for brake care.

Credit: www.fixmyhog.com
Frequently Asked Questions On How To Bleed Front Brakes On Harley
How Do You Bleed The Front Brakes On A Motorcycle?
Begin by ensuring your motorcycle is stable and upright. Attach a hose to the front brake bleeder valve, directing it into a container. Pump the brake lever, hold it down, open the valve to release air, then close it before releasing the lever.
Repeat until no air bubbles emerge.
How Do You Bleed Abs Brakes On A Harley?
To bleed ABS brakes on a Harley, attach a clear tube to the bleed valve, open it, and use the brake lever to pump brake fluid through until free of air bubbles. Close the valve after each pump to maintain pressure.
Repeat until fluid is clear, ensuring the reservoir stays full.
How Do You Bleed Front Brakes By Yourself?
To bleed front brakes by yourself, start with the right tools: a wrench, brake fluid, and a clear tube. Attach the tube to the bleeder valve, open it, and press the brake pedal repeatedly. Close the valve, check the fluid level, and test brakes for firmness.
Repeat if necessary.
How Do You Bleed Front Brakes On A Bike?
Begin by securing your bike upright. Attach a clear hose to the brake caliper’s bleed nipple. Open the nipple, squeeze the brake lever, close the nipple, and release the lever. Repeat until only fluid, no air, exits. Check and top off the brake fluid reservoir periodically.
Conclusion
Bleeding the front brakes on your Harley is crucial for safe riding. It’s a straightforward process you can master with practice, ensuring optimal brake performance. Remember, regular maintenance is key to your bike’s longevity and your safety on the road.
Keep those brakes in top shape, and enjoy the ride!
