To replace the stator on a Harley, first disconnect the battery and remove the outer primary cover. Then, extract the old stator and rotor before installing the new stator.
Replacing the stator on your Harley-Davidson motorcycle can restore its electrical system’s integrity and performance. Given the vital role of the stator in battery charging and overall electrical function, ensuring it operates correctly is crucial for any Harley owner. Undertaking this task requires a methodical approach and attention to detail but is manageable with the right tools and some mechanical savvy.
This introductory guide helps Harley enthusiasts tackle stator replacement with confidence, offering straightforward steps to keep their beloved motorcycles running smoothly. Let’s get your Harley back on the road with a new, efficient stator.

Credit: m.youtube.com
Introduction To The Stator In A Harley Davidson Motorcycle
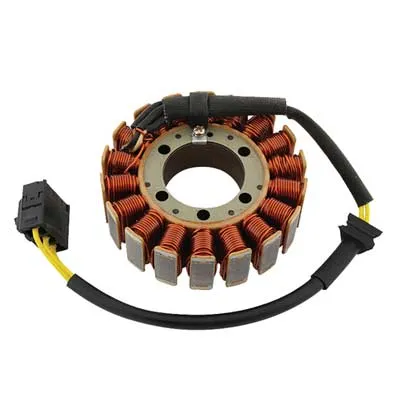
The stator is a crucial part of a Harley Davidson’s engine. It works like a power generator. Its job is to convert engine movement into electrical energy. This energy then powers the bike’s electrical systems. A good stator means a smooth ride.
Recognizing a failing stator is key to maintaining your Harley. Some signs include dim lights and a weak battery. You might also hear odd noises or see the battery dying too quickly. These issues can hint at a stator problem.
Before you replace the stator, take a few preparatory steps. First, ensure your Harley is on a stable surface. Grab your toolkit and have your new stator ready. Read the manufacturer’s manual for guidance. Switch off the engine and let it cool down. Only then should you start the replacement work.
Credit: www.romacustombike.com
Preparing For Stator Replacement
Before replacing a stator on a Harley, gathering the right tools and materials is crucial. Ensure you have a set of screwdrivers, a torque wrench, and the correct stator replacement kit. High-quality electrical contact cleaner and dielectric grease are vital to protect new connections.
For safety, disconnect the motorcycle’s battery before starting work to prevent shocks. Wearing safety glasses and resistant gloves safeguards against potential hazards.
Lifting the bike using a motorcycle jack provides access to the stator compartment. The compartment’s cover must be carefully removed to prevent damage. Keep a clean workspace to avoid losing any small parts during the process.
Step-by-step Guide To Replacing The Stator
Replacing the stator on your Harley is a task that can save you money and improve your motorcycle’s performance. Firstly, remove the seat, side covers, and fuel tank to access the engine area. This prep work is crucial to reach the stator.
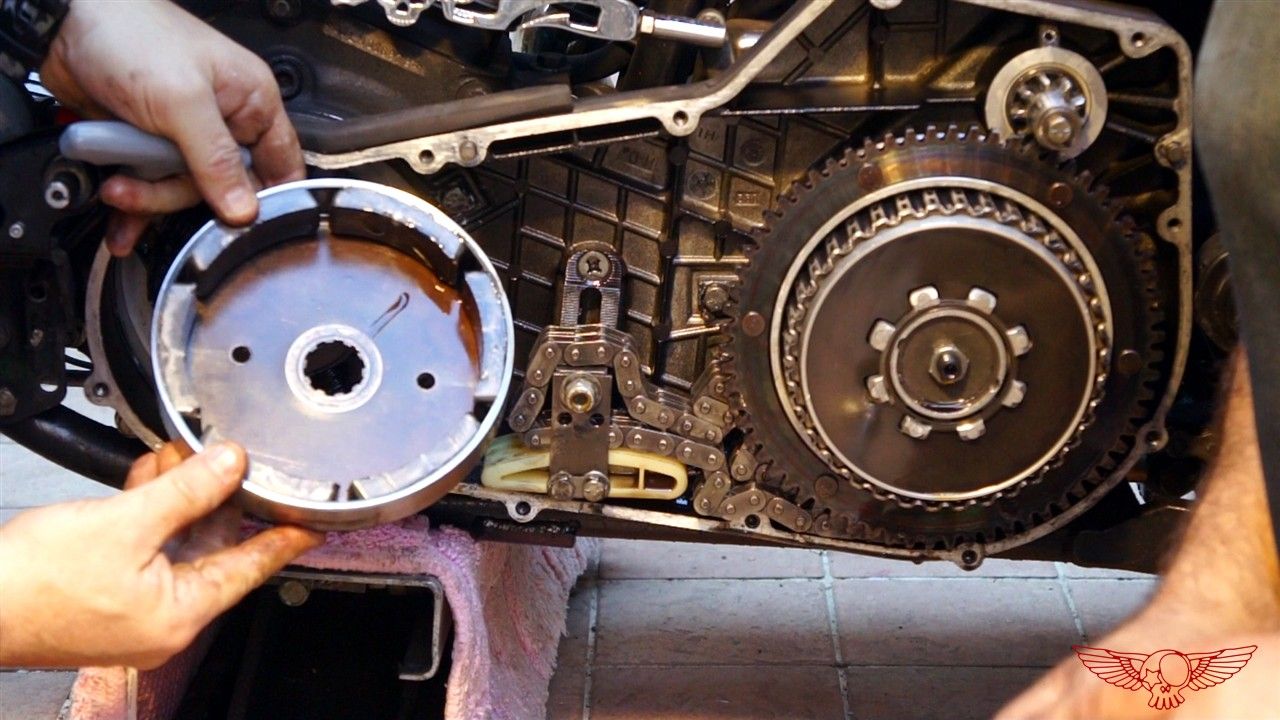
Next, disconnect the battery to ensure safety. Carefully unbolt the stator cover, taking note of any specific wiring. Old stator extraction requires caution to avoid damage to surrounding parts. Labeling wires before disconnecting helps with reinstallation.
To install the new stator, place it correctly as per the manual. Make sure to connect all wires firmly. A correct fit is key to optimal bike function. Once secured, check wiring routes to avoid any potential damage during reassembly.
Finally, reassemble all components in the reverse order of disassembly. Double-check connections and fitment to complete the process. Proper reassembly ensures safety and performance. Test your motorcycle to confirm the success of your stator replacement.
Post-replacement Procedures
Replacing the stator on a Harley demands precise steps, followed by thorough testing for success. To verify its proper functionality, turn on the motorcycle’s engine and use a multimeter. Measure the voltage outputs from your new stator. Results should align with the manufacturer’s specifications. Stay vigilant for unusual noises or issues during idle and revving.
Maintaining the new stator is crucial for long-term performance. Regular inspections can catch early signs of wear or damage. Ensure connections remain clean, tight, and free from corrosion. Use dielectric grease to protect electrical contacts. Plan routine maintenance checks in alignment with your Harley’s service schedule. This proactiveness can greatly extend the stator’s lifespan, saving time and money on potential future repairs.
Troubleshooting Common Issues After Stator Replacement
Electrical issues often emerge after a stator replacement on your Harley. Battery drainage or power inconsistencies are signs something isn’t right. Checking connections for loose wires or corrosion is crucial.
For mechanical complications, listen for unusual noises, which might indicate misalignment. Vibration increases can also suggest the stator isn’t fitted properly. Be sure to recheck all mounting bolts and brackets.
Do-it-yourself (DIY) stator replacement can save money but presents risks. Persistent issues after your personal attempts are a clear sign to seek professional help. A certified mechanic ensures correct installation and safety for your rides.

Credit: www.hdforums.com
Frequently Asked Questions On How To Replace The Stator On A Harley
How Hard Is It To Change A Stator?
Changing a stator can be challenging, as it requires mechanical skill and knowledge of the vehicle’s electrical system. Proper tools and a service manual are essential for a successful replacement. It’s a task often best left to professional mechanics.
How Do I Know If My Stator Is Bad On My Harley?
To determine if your Harley’s stator is bad, check for poor battery charging, an illuminated battery warning light, or unusual bike electrical behavior. A multimeter test can confirm stator function by measuring AC voltage output and resistance.
How Long Does It Take To Replace A Stator?
Replacing a stator typically takes about 2-4 hours for a skilled mechanic. The duration can vary based on the vehicle’s make and model.
What Does A Stator Do On A Harley Davidson?
The stator in a Harley Davidson generates electricity by transforming engine rotation into electrical current, powering the motorcycle’s electrical systems and recharging the battery.
Conclusion
Wrapping up, mastering the stator replacement on your Harley is a rewarding task. With the right tools and this guide, you’ve got all you need for a smooth operation. Remember, regular maintenance keeps your ride roaring on for years. Safe travels and enjoy the empowered journey with your Harley!
