Harley Davidson starter problems can manifest as no engine cranking or a grinding noise. Troubleshooting involves inspecting the battery, starter motor, and electrical connections.
Experiencing issues with your Harley Davidson starter can be frustrating, but most problems stem from a few common sources. A robust understanding of these can save you time and help maintain your motorcycle’s reliability. To ensure your Harley is ready to roar, checking the integrity of the battery is a critical first step; a weak or dead battery is often the culprit for starting woes.
The starter motor itself may also be at fault and requires scrutiny, as worn components can fail to engage the engine. Additionally, don’t overlook the electrical connections, as corrosion or loose wires can impede the flow of electricity needed to kickstart your engine. By concentrating on these key areas, you’re equipped to diagnose and rectify most starter issues, keeping your Harley Davidson in peak condition for the open road.

Credit: m.youtube.com
Introduction To Harley Davidson Starter Problems
Harley Davidson motorcycles have intricate starter systems. Proper functioning is critical for smooth operation. The system includes a starter motor, relay, and associated wiring. These components work together to ignite the engine.
Recognizing starter problems early is important. Frequent issues include noisy operation, failure to engage, and the engine not turning over. Riders may notice a clicking sound when starting, indicating a problem. Each symptom can suggest different issues within the system.
Regular checks and maintenance help prevent unexpected breakdowns. Riders should inspect the starter system routinely. This ensures reliability and longevity of their Harley Davidson bikes. Timely repairs are crucial for continuous enjoyment on the road.
Credit: www.hdforums.com
Diagnosing Harley Davidson Starter Issues
To properly diagnose Harley Davidson starter issues, certain steps should be followed meticulously. Begin with a visual inspection of the starter system. Look for any obvious signs of wear or damage. It’s crucial to check all electrical connections, ensuring they are tight and free of corrosion.
Moving forth, test the battery’s voltage because a weak battery can mimic starter problems. The ideal battery voltage should read above 12.6 volts when the bike is off. Next, examine the starter relay and fuse, replacing them if needed.
For more in-depth testing, use a multimeter to check for continuity. Listen for any abnormal sounds when you attempt to start the motorcycle. A clicking sound can indicate an issue with the solenoid, while no sound may suggest a deeper electrical problem.
Here’s a list of essential tools:
- Battery voltage tester
- Multimeter
- Replacement fuses and relays
- Basic hand tools (screwdrivers, wrenches)
To distinguish starter issues from other electrical problems, focus on the symptoms. A failing starter usually causes a loud click or grinding noise. By contrast, if the engine cranks but doesn’t start, the issue might not be the starter.
Common Harley Davidson Starter Problems And Their Solutions
Faulty starter motors are often spotted by a clicking sound. The motor may need repair or replacement to fix this issue. Mechanics can often rebuild the motor.
A dead battery will show no lights on the dashboard. Testing with a voltmeter confirms the battery status. If dead, replacing it is necessary.
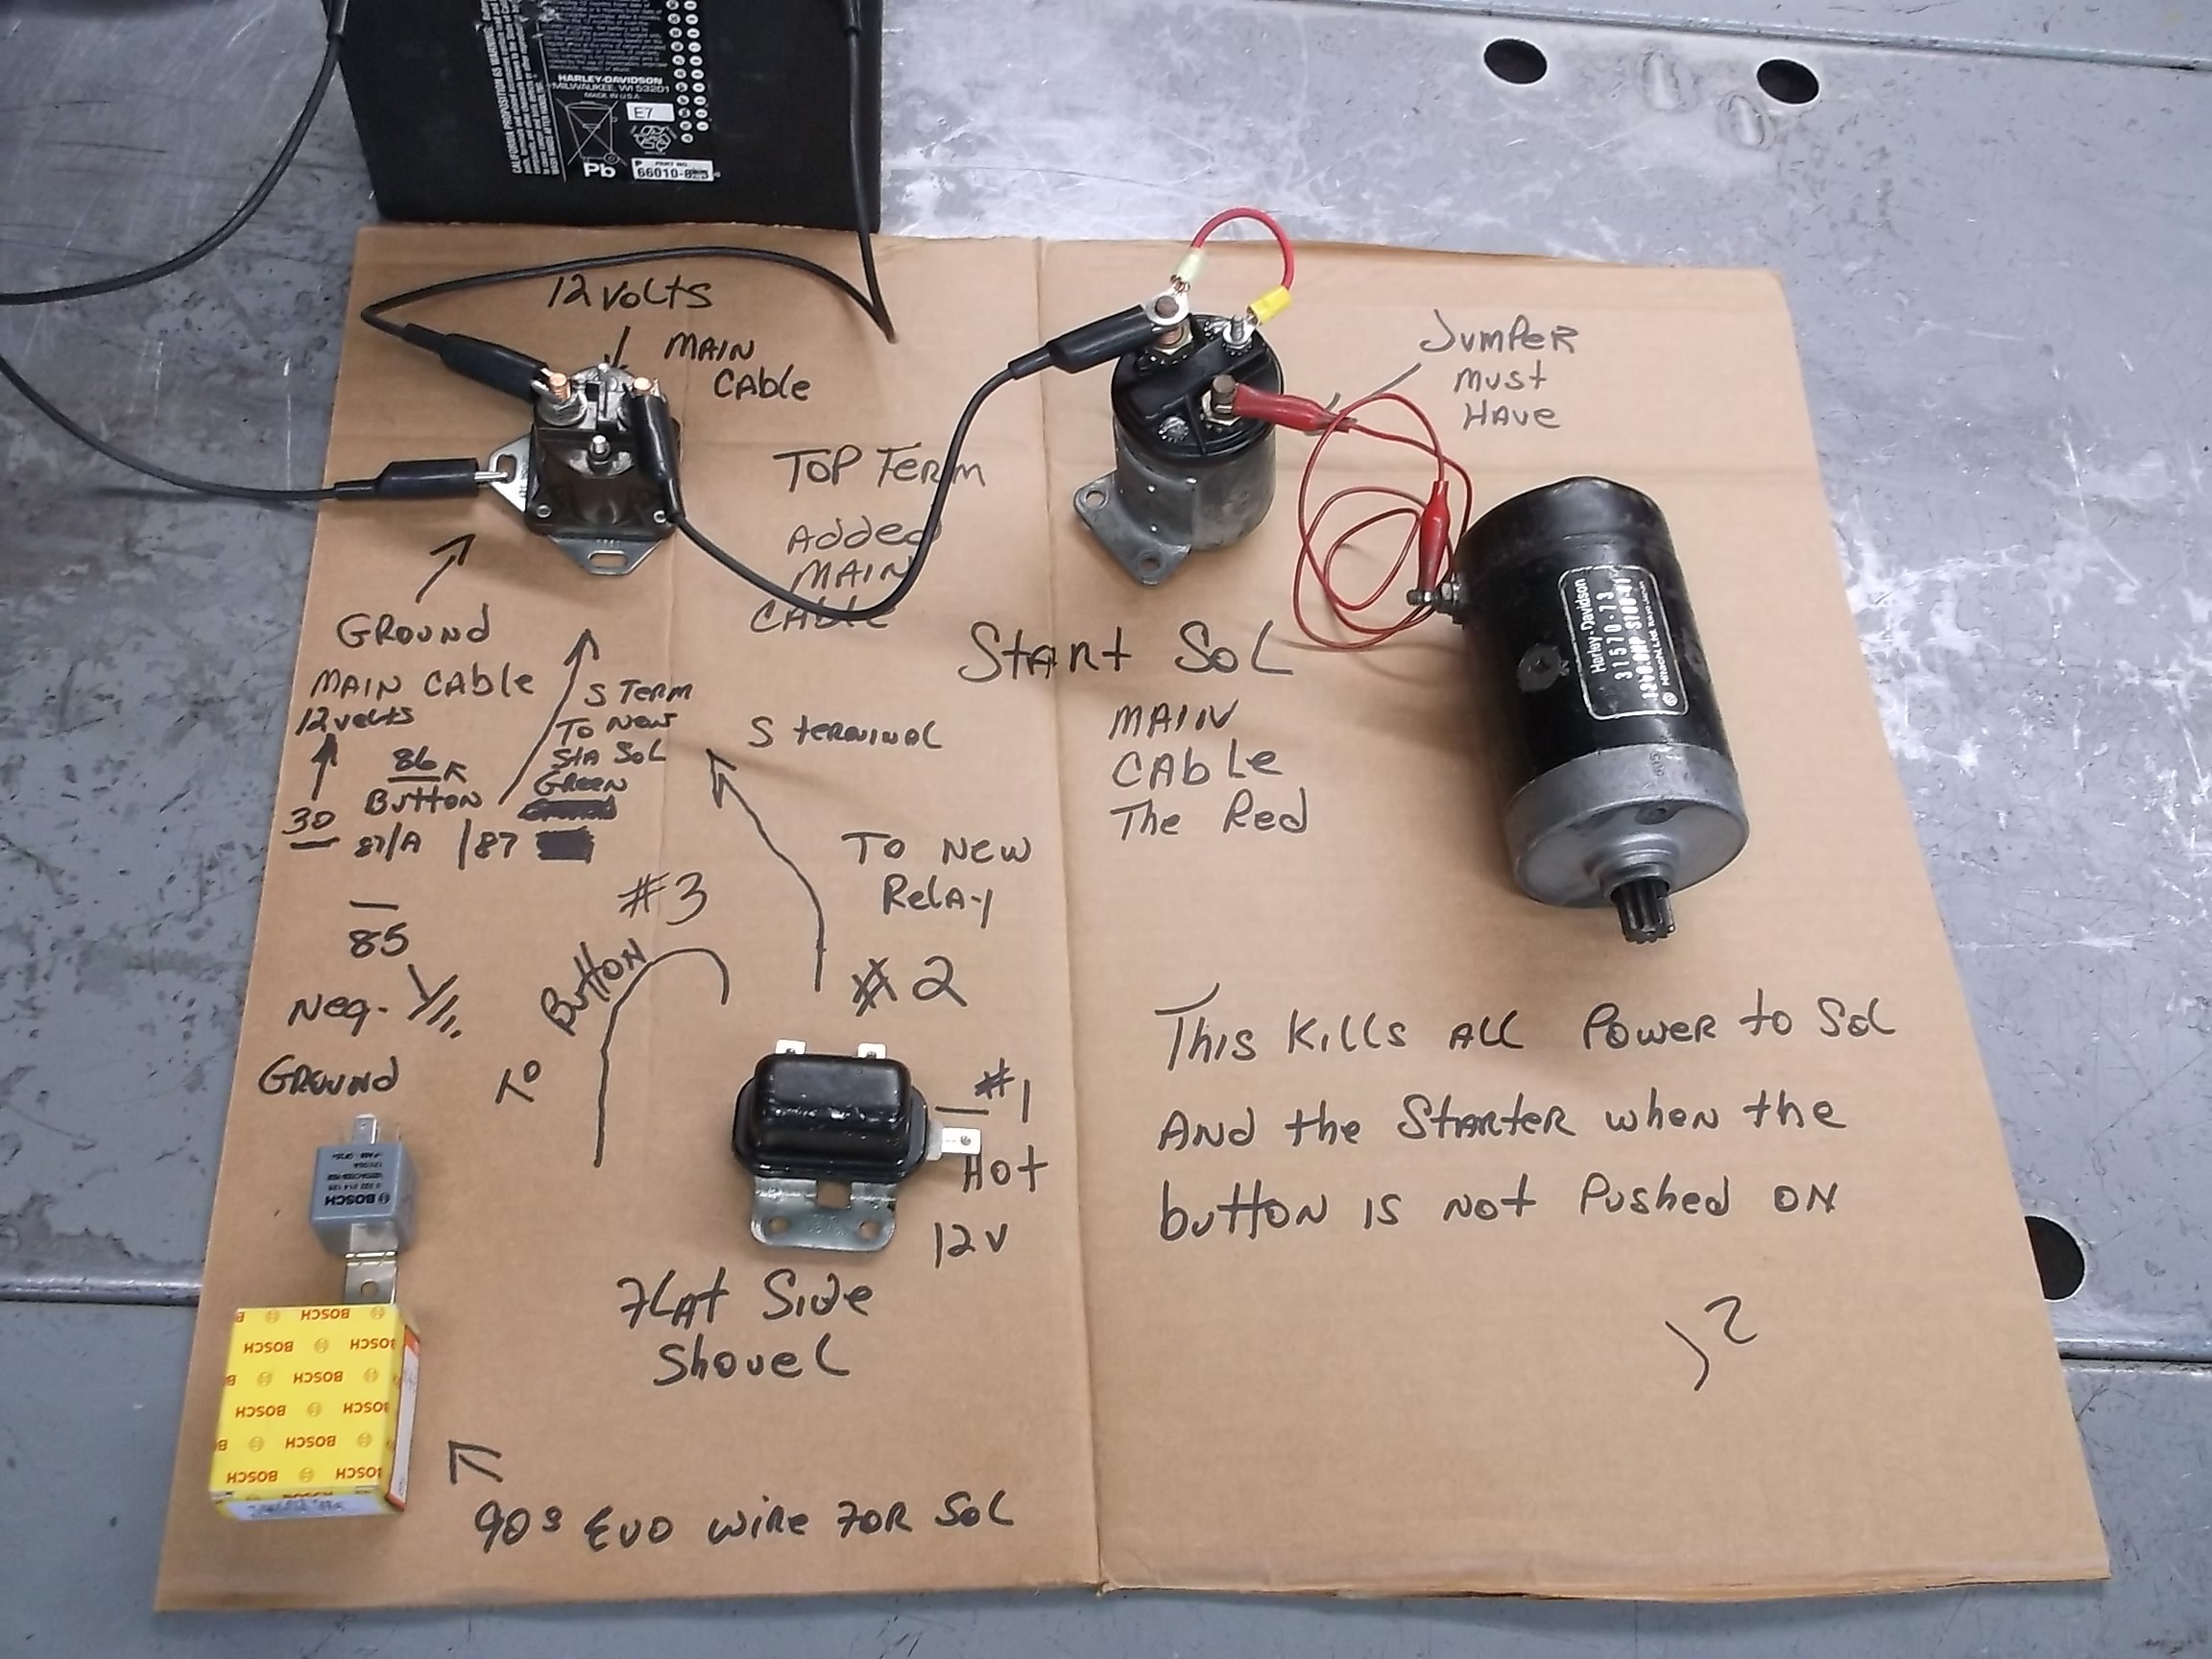
The starter relay can malfunction, causing the starter not to engage. Diagnosing involves checking for a clicking sound. A new relay fixes this problem.
Starter gears or clutch wear out making a grinding noise. A mechanic must inspect and then replace these parts to resolve this.
Bad electrical connections or wiring prevent power from reaching the starter. Inspecting and correcting any faults in connections or wires is crucial.
Preventive Measures And Maintenance Tips
Routine inspection of starter system components is crucial for a Harley Davidson. Check the battery, cables, and connections every month. Ensure tight connections and corrosion-free terminals for optimal performance.
- Maintain the battery charge by regularly riding the bike or using a trickle charger.
- Clean and secure all electrical connections to prevent power loss.
- Use a multimeter to test the starter relay and solenoid function.
| Maintenance Task | Frequency |
|---|---|
| Battery Inspection | Monthly |
| Cable Check | Monthly |
| Terminal Cleaning | As needed |
| Electrical Tests | Semi-annually |
Long-term care includes storing the bike in a dry place and using a motorcycle cover. Regular use avoids sediment build-up. Check the owner’s manual for model-specific tips. Seek professional help for complex issues.
Advanced Troubleshooting For Persistent Starter Problems
Facing persistent starter problems on your Harley Davidson? It can be tough to decide whether to seek professional help. Sometimes, the issue is too complex for home repair. A specialized technician might need to take a look. It’s best to bring in an expert when you hear unusual noises, experience intermittent starting issues, or when the starter fails repeatedly after home remedies.
The costs can vary widely between repair and replacement. A simple fix might only cost a few dollars for a new part, but a full replacement can be much pricier. Create a budget and compare prices from different services. Check if a full replacement offers a better long-term investment than repeated repairs.
An upgrade can improve your ride’s dependability and performance. Consider a higher-quality starter system if you demand more from your bike. Look for systems with better warranties and advanced features. This can lead to fewer headaches down the road and a smoother, more reliable start every time.
Conclusion: Ensuring Reliable Start-ups
Harley Davidson motorbikes need regular checks and fixes to avoid starter issues. Swift action when problems emerge is crucial. This keeps your rides smooth and trouble-free. Maintaining your bike well can prevent many common starter problems.
Keeping up with routine upkeep will mean fewer unexpected repairs. This reduces the chance of being stranded due to starter failures. It’s not only about the cost. Your safety on the road is important too. So, regular maintenance can’t be ignored.
Riders must keep their bikes in top shape to ensure they’re always ready to go. Remember that a happy bike makes for a happy rider. Love your Harley, and it will love you back with reliable start-ups every time.

Credit: m.youtube.com
Frequently Asked Questions Of Harley Davidson Starter Problems Troubleshooting
How Do I Know If My Harley Starter Is Bad?
To determine if your Harley starter is bad, listen for clicking noises, observe if the engine doesn’t turn over, and check for dimming lights when starting.
What Are The Symptoms Of A Starter On A Motorcycle?
Common symptoms of a motorcycle starter issue include clicking sounds, engine not turning over, intermittent starting problems, and the starter motor staying on without engaging.
How Do You Test A Motorcycle Starter?
To test a motorcycle starter, first ensure the battery is fully charged. Then, locate the starter relay and use a jumper wire to bridge the power terminals. Listen for a click, indicating the relay is functioning. If the starter motor doesn’t engage, it may require replacement.
Where Is The Starter Relay Located On A Harley Davidson?
The starter relay on a Harley Davidson is typically located under the seat, near the bike’s battery. It can vary slightly by model, so consult your owner’s manual for exact placement.
Conclusion
Navigating through starter issues with your Harley Davidson can be daunting, yet it’s essential for a smooth ride. Armed with the troubleshooting tips from this post, riders are better prepared to tackle problems head-on. Remember, timely maintenance and keen attention to your bike’s starting behavior can keep those classic engines roaring for years to come.
Stay vigilant on the road and enjoy the ride!
